Follow us:


If your WordPress site feels slow or your hosting struggles during traffic spikes, it may be time to use a CDN (Content Delivery Network). Thankfully, Cloudflare offers one of the best free CDN solutions, and it works perfectly with WordPress.
In this guide, we’ll explain what Cloudflare is, why you should use it, and how to set it up step by step—even if you’re a complete beginner.
What is a CDN and Why Do You Need One?
Every website is hosted on a server, usually located in one specific region. When someone visits your site from a location far away from your server, the data has to travel a longer distance, which slows down the loading speed.
A CDN (Content Delivery Network) solves this by storing copies of your site’s static files (like images, CSS, and JavaScript) on multiple servers around the world. When a visitor opens your site, the CDN delivers content from the server closest to them.
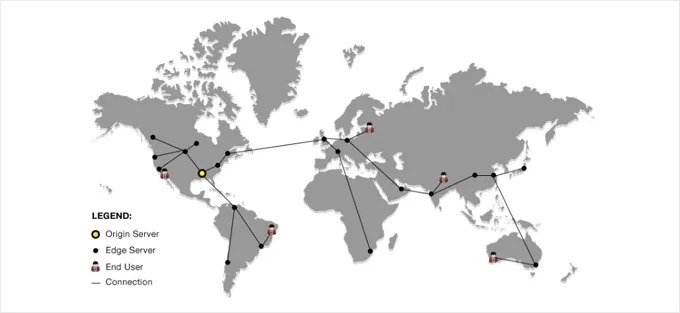
Benefits of using a CDN like Cloudflare:
- Faster loading speed for visitors worldwide
- Better SEO rankings because Google values site speed
- Lower bounce rates as visitors are less likely to leave a slow site
- Reduced server load by distributing traffic
- Extra security with DDoS protection and a firewall
Why Choose Cloudflare?

Cloudflare isn’t just a CDN—it’s an all-in-one performance and security platform.
Even on the free plan, Cloudflare gives you:
- A global CDN network
- Free SSL certificate
- Web Application Firewall (WAF)
- Protection against DDoS attacks
- Performance optimization features like Auto Minify and Brotli compression
And the best part? The free plan is enough for most small to medium WordPress websites.
Step-by-Step: How to Set Up Cloudflare Free CDN in WordPress
Let’s walk through the process. Don’t worry—it looks technical, but if you follow step by step, it’s simple.
Step 1: Create a Cloudflare Account
Visit Cloudflare.com.
Click Start for Free.

Sign up with your email address and set a password.
You can also sign up using Google or Apple for convenience.

Once your account is ready, you’ll be taken to the dashboard.
Step 2: Add Your Website
Click on Add a Site in your dashboard.
Enter your website into the ‘Enter an existing domain’ field.
Type in your domain name (example: mywebsite.com). Don’t include https:// or www.
Click Continue.
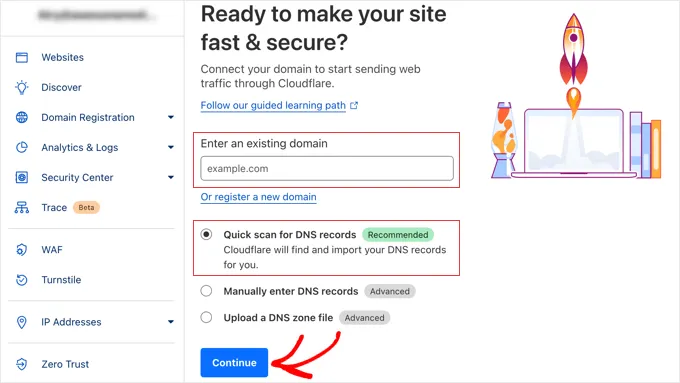
Cloudflare will scan your existing DNS records from your hosting provider.
This step ensures your current website settings are carried over correctly.
Step 3: Choose the Free Plan
Cloudflare offers different plans, but for now, select the Free Plan.
Click Continue to move ahead.

Step 4: Review and Confirm DNS Records
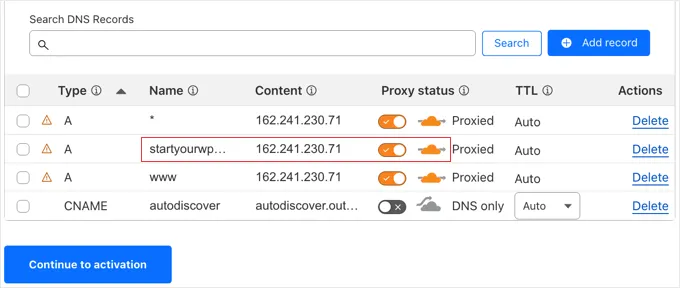
Cloudflare will show you a list of DNS records it detected.
- Make sure your main domain and key subdomains (like
www) have the orange cloud icon turned on.- Orange cloud = Cloudflare is protecting and accelerating that record.
- Gray cloud = Record is bypassing Cloudflare (not recommended for your main site).
Click Continue to activation when ready.
Step 5: Change Your Nameservers
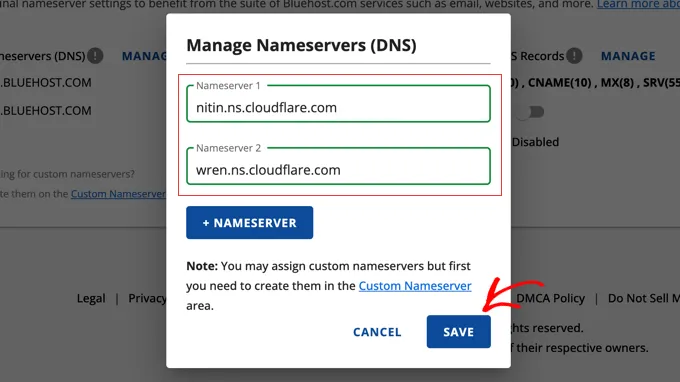
This is the most important step. Cloudflare will give you two nameservers (something like nitin.ns.cloudflare.com and wren.ns.cloudflare.com).
Now you need to replace your existing nameservers with these two at your domain registrar.

How to Update Nameservers (Examples):
- GoDaddy:
- Log in to your GoDaddy account.
- Go to My Products → Domain Settings.
- Under Nameservers, click Change → Custom.
- Enter the Cloudflare nameservers and save.
- Namecheap:
- Log in to your Namecheap dashboard.
- Go to Domain List → Manage next to your domain.
- Under Nameservers, select Custom DNS.
- Paste the Cloudflare nameservers and save.
- HostGator / SiteGround:
Log in to your hosting account → Go to Domains → Select your domain → Replace nameservers with Cloudflare’s.
Bluehost:
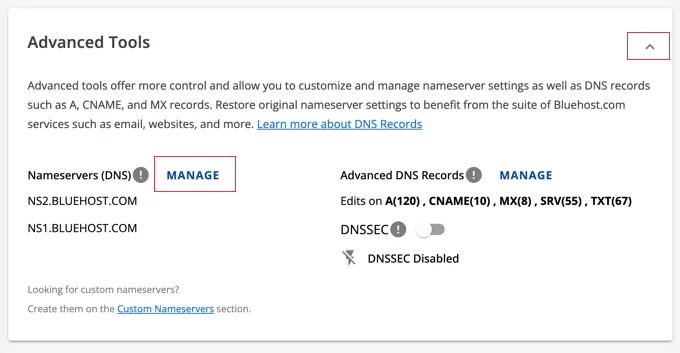
Log in to your hosting account → Go to Domains → click the ‘Settings’ button next to your domain name.
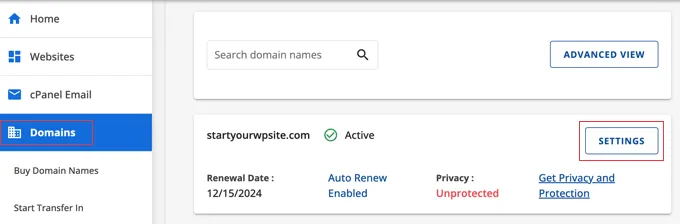
Next, you need to scroll down to the Advanced Settings section and expand it by clicking the arrow on the right of the screen. This will show your website’s DNS settings, including the nameservers.
Next to ‘Nameservers (DNS), you should click the ‘Manage’ button.
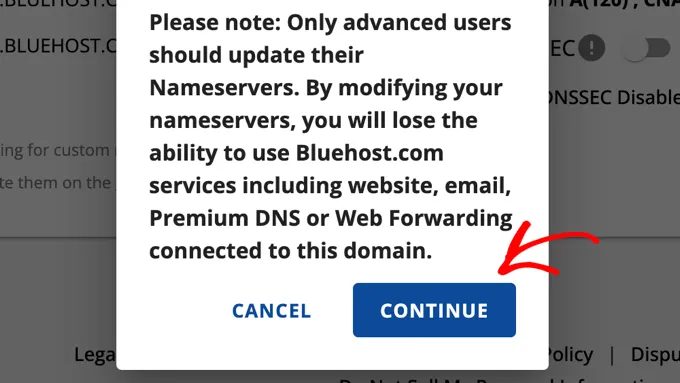
This will pop up a warning that only advanced users should update their nameservers.
You need to click the ‘Continue’ button to acknowledge this and move on to the next step.
Next, you need to enter the nameservers provided by Cloudflare.
Then, click the ‘Save’ button.
Step 6: Finish the Setup
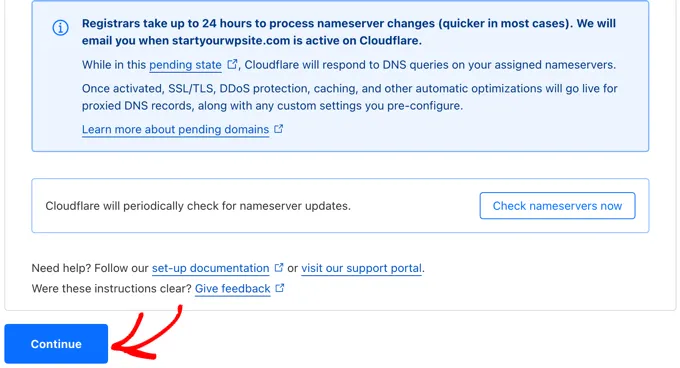
Go back to the Cloudflare setup page and click the ‘Check nameservers now’ button. Cloudflare will now check your nameservers periodically and send you an email once they are active.
Click the ‘Continue’ button to finish the setup.
Note: Nameserver changes may take up to 24–48 hours to fully update (propagate). During this time, your site should remain online without downtime.
Once activated, you will get an email from CloudFlare:

You will see the success message in your Cloudflare dashboard.

By setting up Cloudflare’s free CDN, you’ve given your WordPress website a major performance and security boost. Visitors around the world will experience faster load times, and your site will be better protected against attacks.
The best part? It’s completely free and doesn’t require advanced technical skills. With just a few steps, your WordPress site is now running smarter, faster, and safer with Cloudflare.


