Follow us:


By default, WordPress keeps user registration extremely simple. When someone signs up on your site, they are only asked for:
- Username
- Email address
That’s it.
For a basic blog, this might be enough. But if you are building:
- A membership website
- An online course platform
- A community site
- A multi-author blog
- A client portal
- Or even a WooCommerce store
Then you probably need more information during registration.
Maybe you want to collect:
- Phone number
- Company name
- Address
- Social media profiles
- Date of birth
- User preferences
- Custom identification numbers
In this guide, we’ll show you how to add additional user profile fields to WordPress registration using free solutions — no coding required.
Why Add Extra Fields to the WordPress Registration Form?
Before we jump into the steps, let’s understand why this matters.
When WordPress only collects username and email, you miss valuable context about your users.
Adding custom fields allows you to:
1. Improve Communication
If you collect phone numbers or messaging preferences, you can create better support systems.
2. Personalize User Experience
Knowing a user’s role, interest, or industry helps you deliver targeted content.
3. Organize Members Better
For membership or LMS websites, additional data helps you segment users properly.
4. Reduce Back-and-Forth Emails
Instead of asking for extra information later, you collect it upfront.
In short, extra profile fields help you run your site more professionally.
Method 1: Add Additional Fields Using Advanced Custom Fields (Recommended)
The most flexible free solution is Advanced Custom Fields.
Advanced Custom Fields is widely used by developers, but beginners can use it too. It allows you to create custom fields for posts, pages, and even users.
We will use it to add fields to the registration form.
Step 1: Install and Activate the Plugin
- Go to your WordPress dashboard.
- Navigate to Plugins → Add New.
- Search for Advanced Custom Fields.
- Click Install Now.
- After installation, click Activate.

Once activated, you will see a new menu item called ACF in your dashboard.
Step 2: Create a New Field Group
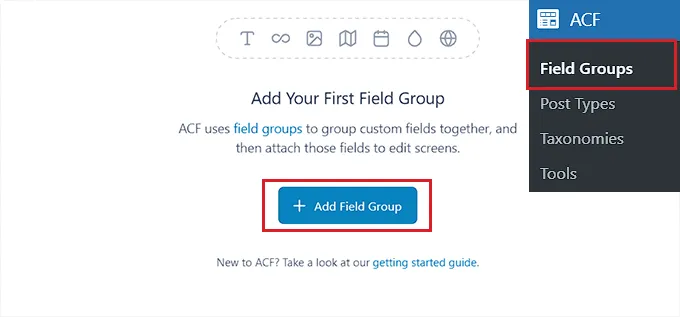
Go to ACF → Field Groups.
Click the Add Field Group button.
Give your field group a clear title, such as:
- “Registration Extra Fields”
- “User Additional Information”
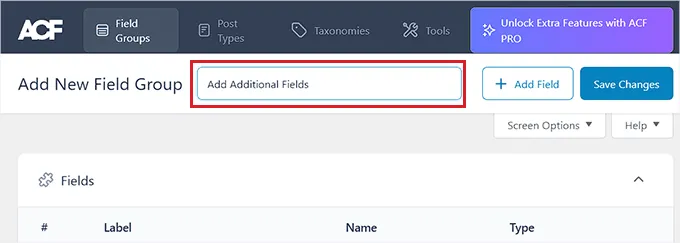
A Field Group is simply a container that holds your custom fields.
Step 3: Add Your Custom Fields
Now click Add Field.
You will see several settings:
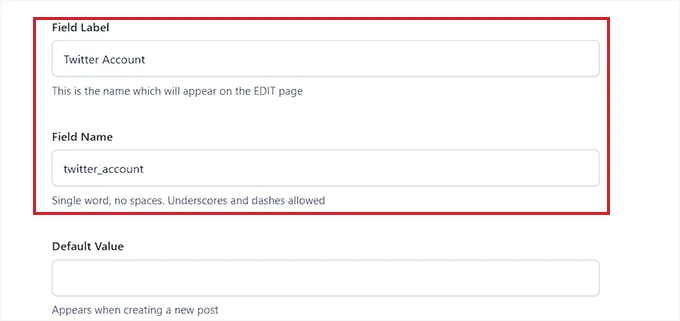
Field Label
This is what users will see on the registration form.
Example: Phone Number
Field Name
This is automatically generated. You can leave it as is.
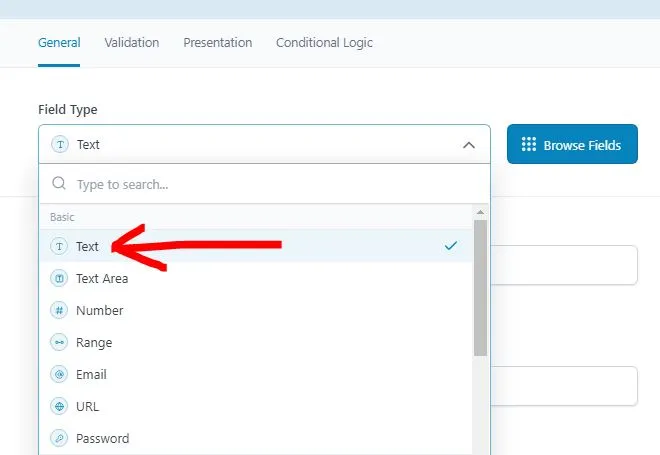
Field Type
Choose the type of data you want to collect:
- Text
- Number
- URL
- Date Picker
- Select dropdown
- Checkbox
- Radio button
For example:
- Use Text for Company Name
- Use Number for Phone
- Use URL for LinkedIn profile
Now, type the name of your field into the ‘Field Label’ option. For instance, if you want users to provide their Twitter handle before registering, then you can enter that into the field.
The plugin will then automatically generate a field name according to your label name.
You can also Mark the field as Required. Switch to the ‘Validation’ tab for that.
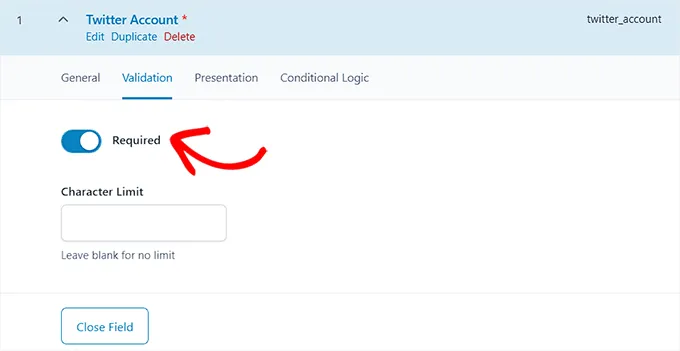
After that, you can even set a character limit for your custom field.
Now, switch to the ‘Presentation’ tab at the top. You can add placeholder text and instructions below the field.
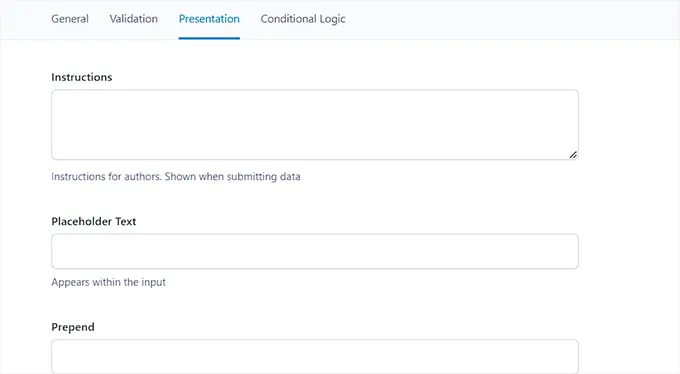
Repeat this process for every field you want to add.
Step 4: Display Fields on the Registration Form
This is the most important step.
Scroll down to the Location section.
Set the rule to:
User Form → is equal to → Register
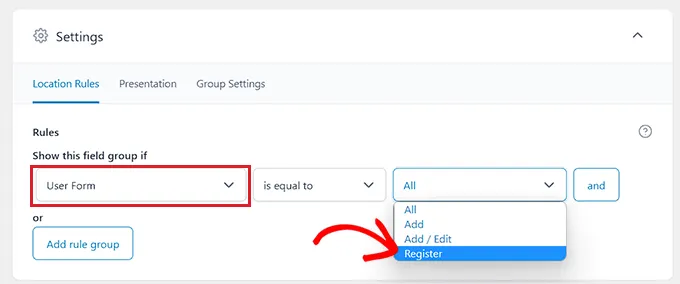
This tells WordPress to display your custom fields on the registration page.
If you skip this step, the fields won’t appear during signup.
Now, click on the Add rule group button:
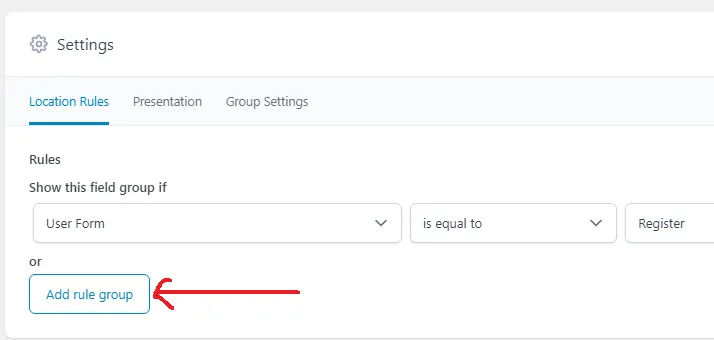
Set the rule to: User Form → is equal to → Add / Edit
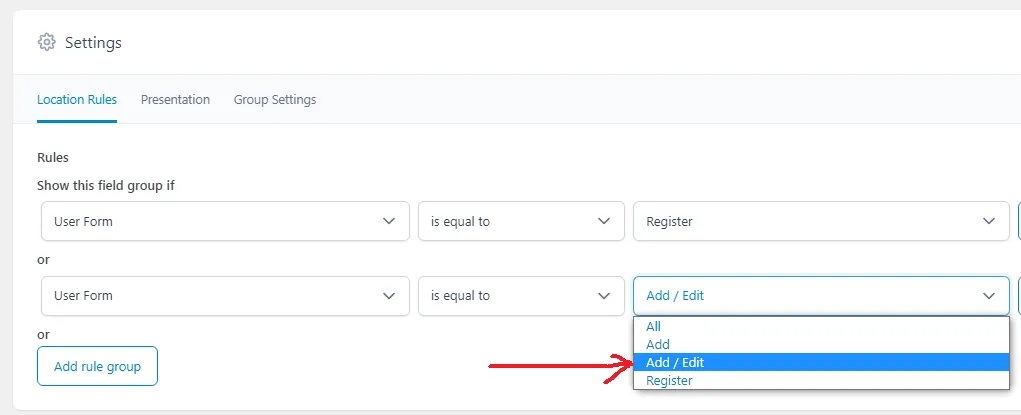
This tells WordPress to display your custom fields on the user profile page.
Step 5: Publish the Field Group
Click the Save Changes button.
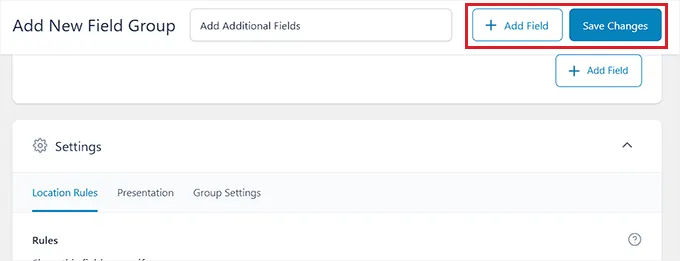
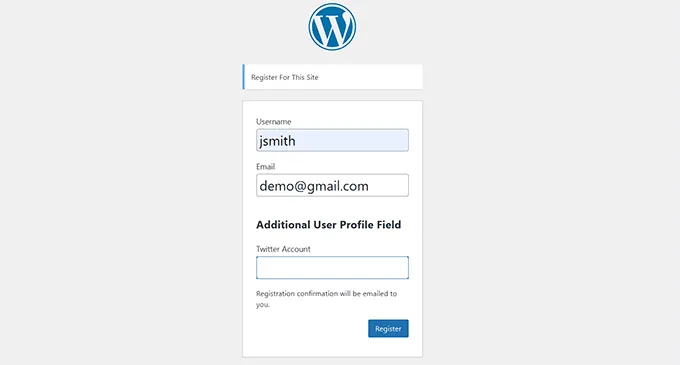
Now visit your registration page and test it.
You should see your newly added fields alongside username and email.
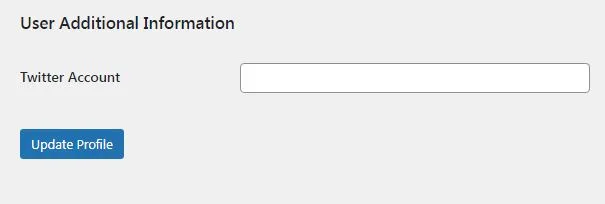
Now visit your profile page and test it.
You should see your newly added fields at the bottom of the profile page.
Important Notes About ACF
- The data will be saved as user meta.
- You can view it later in Users → Edit User.
- You can also display this information in themes using simple template functions (if needed later).
This method is flexible and scalable, especially if your site grows.
Method 2: Use a Dedicated User Profile Fields Plugin (Free Alternative)
If you want something simpler and more focused only on user fields, you can use:
This plugin is specifically designed for extending user profiles.
Step 1: Install and Activate the Plugin
- Go to Plugins → Add New.
- Search for Profile Extra Fields.
- Click Install Now.
- Activate the plugin.
After activation, you’ll see a new menu for managing extra fields.
Step 2: Add a New Field
- Go to Profile Extra Fields → Add New.
- Enter a name for your field (e.g., Phone Number).
- Select the field type (text, checkbox, select, etc.).
- Add a description if needed.
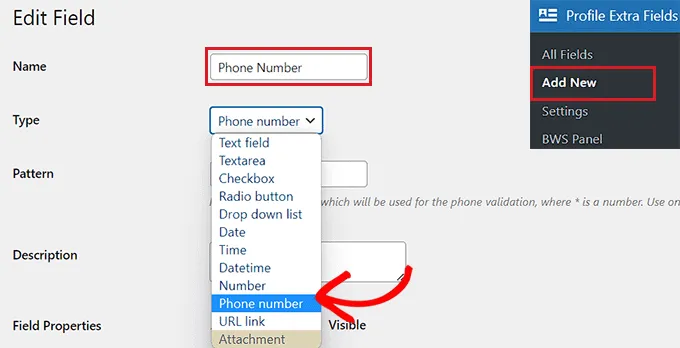
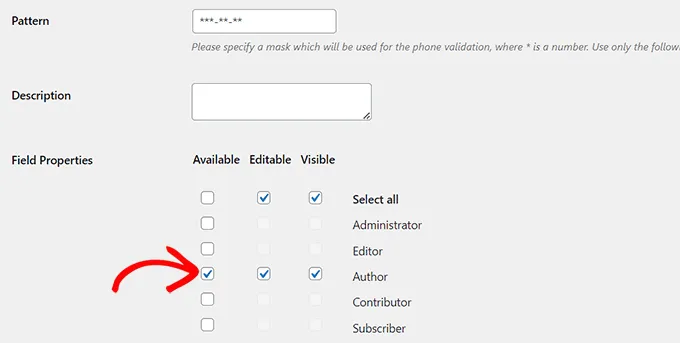
After that, you can also type a pattern for your phone number field or add a description for it.
Next, scroll down to the ‘Field Properties’ section and check the boxes for the user roles you want this field to be displayed for.
Step 3: Show the Field on Registration
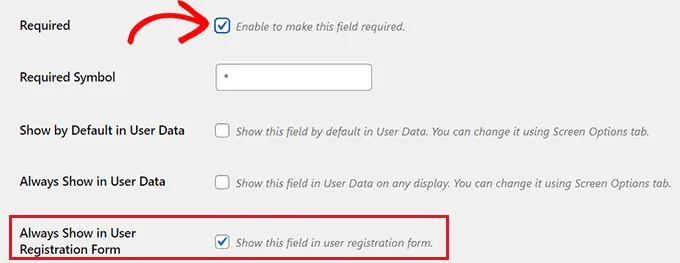
Check the ‘Required’ box if you do not want users to register without filling in this field on the form.
There is an option that says something like:
Always Show in User Registration Form
Make sure this is enabled.
Step 4: Enable WordPress Registration (If Not Already Enabled)
If your registration page shows nothing, check:
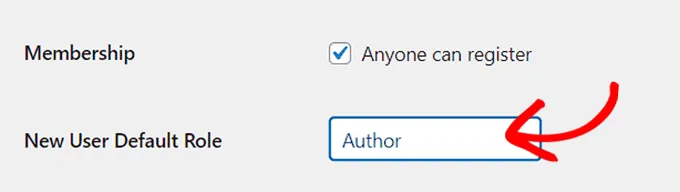
Go to Settings → General
Enable:
Anyone can register
Also confirm the default user role matches what you selected inside the plugin.
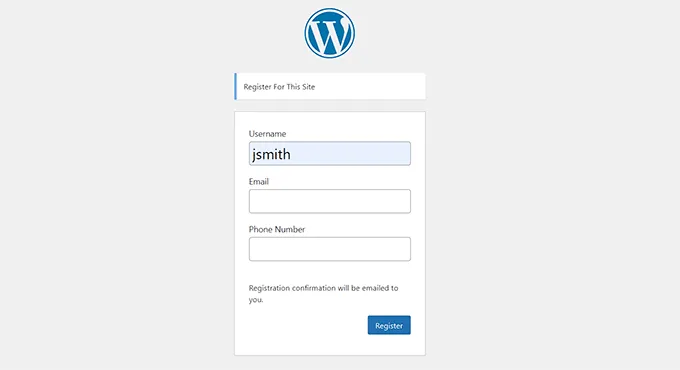
You will see that a phone number field is added to the registration form.
Which Method Should You Choose?
Here is a quick comparison:
| Feature | Advanced Custom Fields | Profile Extra Fields |
|---|---|---|
| Flexible field types | Yes | Yes |
| Best for developers | Yes | Moderate |
| Beginner friendly | Moderate | Very easy |
| Scalable for large sites | Yes | Limited |
| Works without coding | Yes | Yes |
Our Recommendation
- If you plan to expand your website in the future → Use Advanced Custom Fields
- If you only need simple additional fields → Use Profile Extra Fields
Both are completely free.
Where Is the Data Stored?
All additional fields are stored as user meta data inside WordPress.
You can access it from:
Users → Edit User
Or retrieve it programmatically later if needed.
Follow this article: How to Display Custom User Profile Fields on the Frontend
Final Thoughts
The default WordPress registration form is intentionally minimal. But most real-world websites need more than just a username and email.
Adding additional user profile fields allows you to:
- Build better user relationships
- Personalize content
- Collect structured data
- Operate like a professional platform
And the best part? You can do it entirely with free plugins.