Follow us:


Want to display different sidebars on different pages or posts in WordPress? Custom sidebars allow you to tailor content, calls-to-action, or widgets based on the context — whether you’re running a blog, an online store, or a service-based website.
In this guide, we’ll show you how to display a different sidebar for each post or page in WordPress using methods that fit both classic and block themes — no coding needed.
Why Display Different Sidebars?
By default, WordPress themes come with a single sidebar that appears site-wide. While that works for basic layouts, it’s not ideal if you want to:
- Show targeted promotions on specific posts.
- Add custom menus or widgets per page.
- Display a contact form, table of contents, or related posts only on certain areas of your site.
That’s where custom sidebars come in.
Let’s explore two effective ways to do this — one for classic themes, and the other for block themes (site editor).
Method 1: Use Lightweight Sidebar Manager Plugin (For Classic Themes Only)
If you’re using a classic theme (like Astra, GeneratePress, or any theme that doesn’t support full site editing), this is the easiest and cleanest solution.
We’ll use the free Lightweight Sidebar Manager plugin by Brainstorm Force — the makers of Astra.
Step 1: Install the Plugin
- From your WordPress dashboard, go to Plugins » Add Plugin.
- Search for Lightweight Sidebar Manager.
- Click Install Now and then Activate.
Step 2: Create a Custom Sidebar
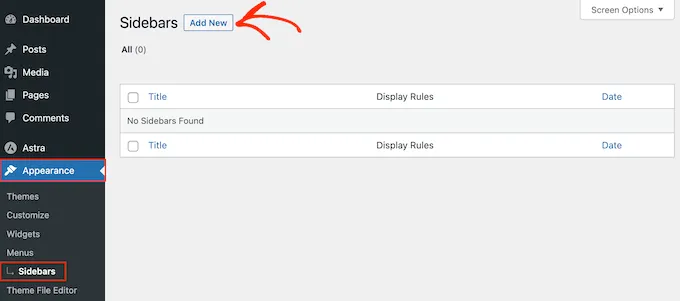
Go to Appearance » Sidebars.
To create the first sidebar, click on the ‘Add New’ button.
Give your new sidebar a name.
Open the ‘Sidebar To Replace’ dropdown menu and choose the location where you want to show the sidebar.
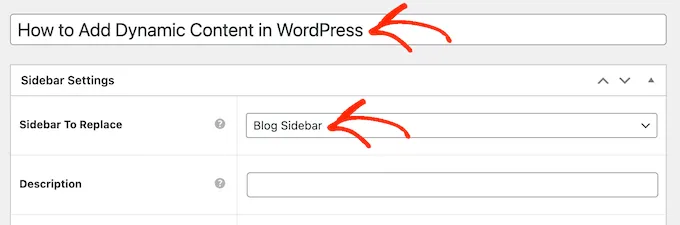
Now, you can control where the sidebar appears by creating inclusion or exclusion rules.
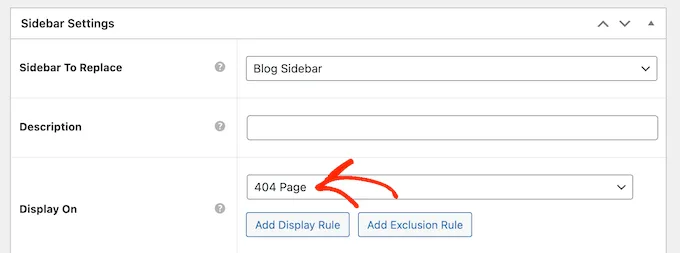
To create an inclusion rule, just open the ‘Display On’ dropdown and choose the pages, posts, custom post types, or categories where you want to use the sidebar.
For example, you might add the sidebar to a specific page, such as your 404 error page, the author archive, or blog page.
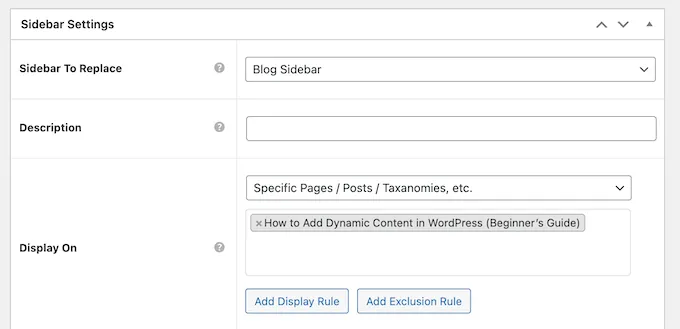
Another option is using the sidebar for a particular page, post, or category by selecting ‘Specific Pages/Posts/Taxonomies.’
This adds a box where you can type in the page, post, or category.
To create more inclusion rules, simply click on the ‘Add Display Rule’ button.
This adds a section where you can create the new inclusion rule.

If you prefer, then you can create exclusion rules instead. For example, you may want to show the sidebar on every page except the front page.
You can also combine inclusion and exclusion rules to control exactly where the sidebar appears on your WordPress blog.
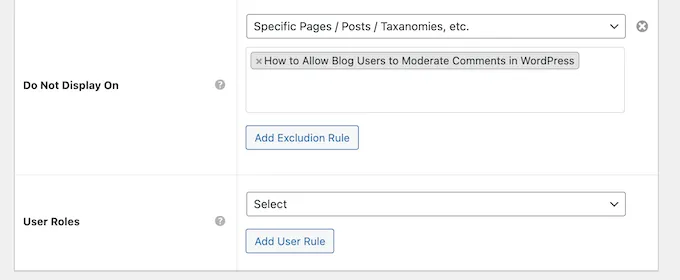
To create an exclusion rule for the sidebar location, just click on the ‘Add Exclusion Rule’ button.
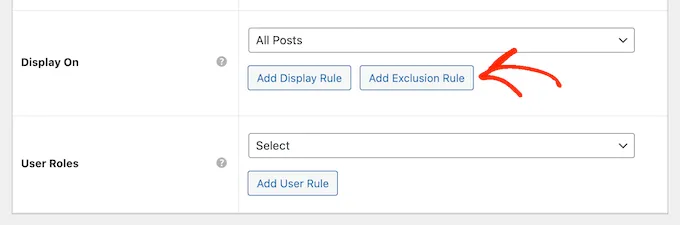
In the new ‘Do Not Display On’ section, open the dropdown menu and select the page or post that shouldn’t use this sidebar.
You can also exclude the sidebar from WordPress pages that have a specific category by following the same process described above.
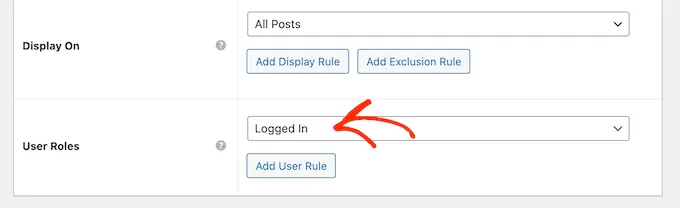
After deciding where the sidebar will appear, you may want to show different content to different users.
To do this, open the ‘User’ dropdown and choose a role from the dropdown menu. Now, only people with this specific user role will see the sidebar.
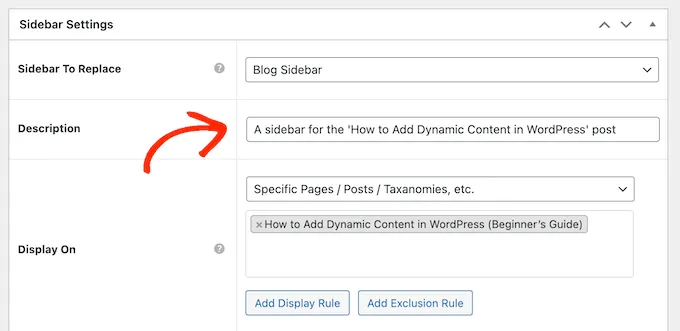
Finally, you may want to type in an optional description. This will only appear in the WordPress dashboard, so it’s a good way to leave yourself notes.
Now, click on ‘Publish.’
Step 3: Add Widgets
Go to Appearance » Widgets. You will now see all the widget areas that your theme supports by default, plus the new sidebar you created in the previous step.
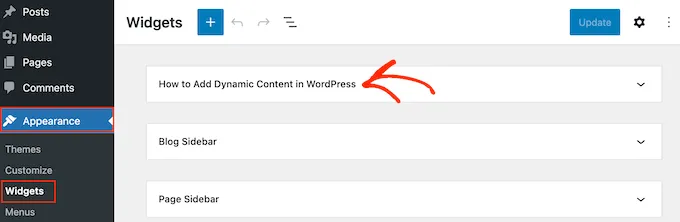
You can now add widgets to the sidebar, just like any other widget section.
Your custom sidebar will now appear on that specific post or page, while other areas of your site will continue using the default sidebar.
Important: This method works only with classic themes. If your site uses a block-based theme, continue to the next method.
Method 2: Create Custom Sidebars in the Full Site Editor (For Block Themes)
If your site uses a block theme (like Twenty Twenty-Four, Neve FSE, or any theme built for the Gutenberg site editor), you can create custom sidebar areas using template parts — no plugin required.
Here’s how to do it.
NB: We will use the Twenty Twenty-Four theme to demonstrate this method.
Step 1: Access the Site Editor
Go to Appearance » Editor.

This opens the Gutenberg Full Site Editor, which lets you edit headers, footers, and other template parts visually.
Step 2: Create a Custom Template
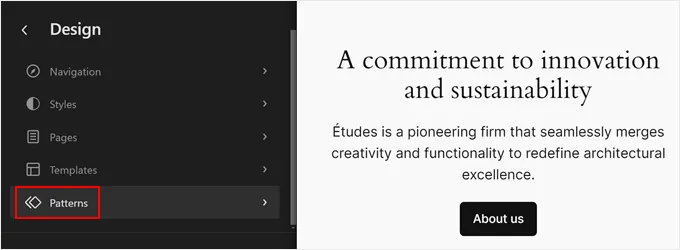
To create a new sidebar, you have to select ‘Patterns.’
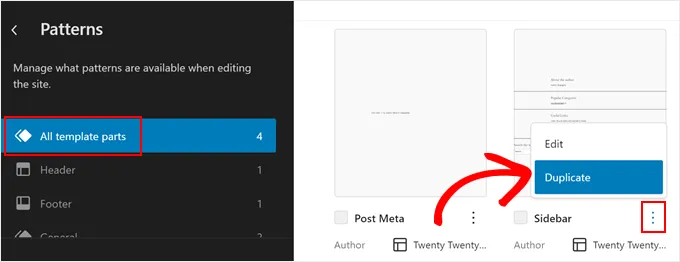
Now, click ‘All template parts.’
You should now see a template part called ‘Sidebar.’ Go ahead and click on the three-dot menu, and then select ‘Duplicate.’ This will make a copy of the sidebar template that you can then customize.
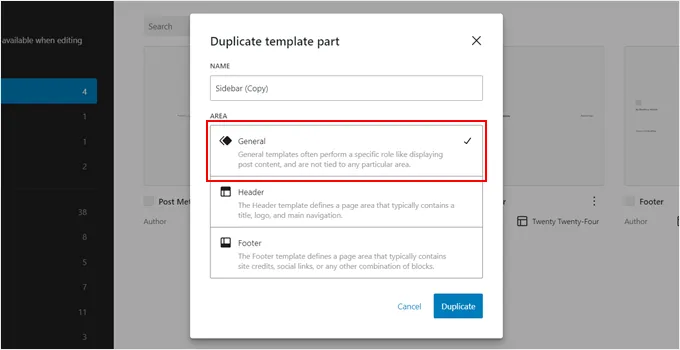
In the new popup, give your new sidebar a name to easily identify it later.
In the ‘Area’ section, select ‘General.’ Once done, just click ‘Duplicate.’
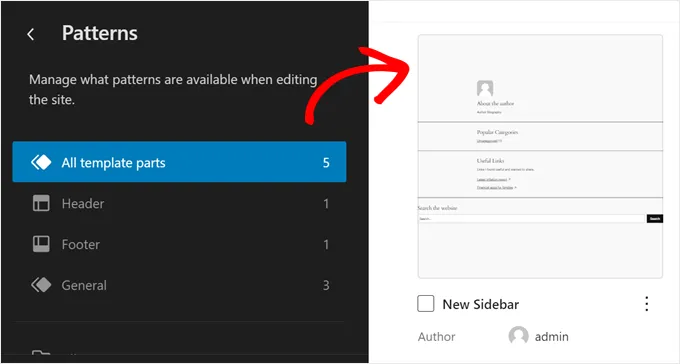
You should now see your newly duplicated sidebar in the list of template parts.
Simply click on the thumbnail to open the editing interface.
Step 3: Add or Edit the Sidebar Area
Now, you can start customizing your sidebar, add more blocks, or configure them to match your website design. The full-site editor works the same way as the Gutenberg block editor in that you only need to drag and drop blocks onto the template part.
In our case, we’ve decided to display our most recent posts, a call-to-action button to subscribe to our email list.
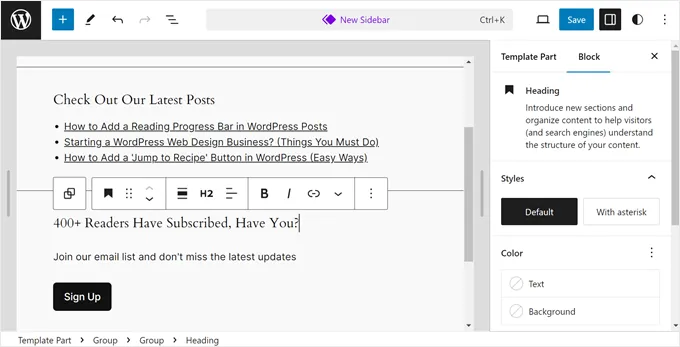
Once you’re happy with how the sidebar looks, click on the ‘Save’ button.
Now, we need to add this new sidebar to a page template.
First, go back to the full-site editor main menu. Then, click ‘Templates.’

The Twenty Twenty-Four template has several page templates with a sidebar, but they’re all using the same sidebar template part. Let’s change one of them with our newly created sidebar.
To do this, select a page template with a sidebar. In our case, we will select ‘Page with Sidebar’ so that the sidebar on regular pages looks different from the one on single WordPress posts.
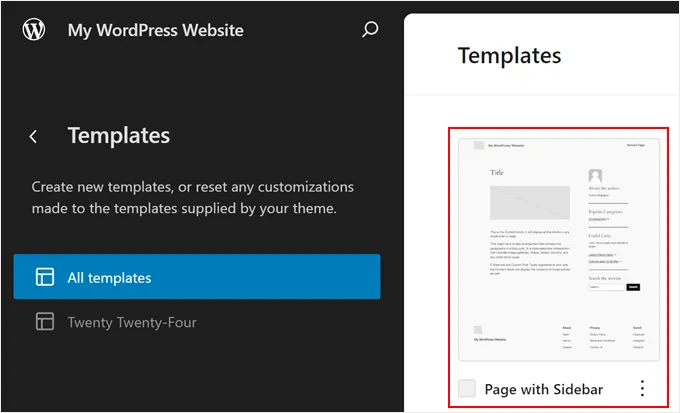
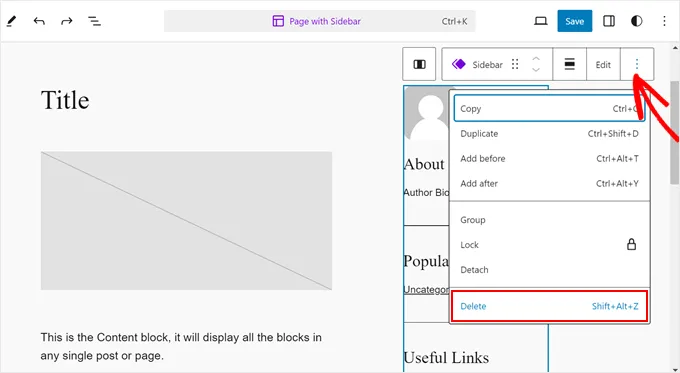
In the editing interface, click on the ‘Sidebar’ section.
On the block toolbar, click on the three-dot menu and select ‘Delete’ to remove the old sidebar.
Next, click on the ‘+’ icon on that same section.
After that, locate and select ‘Template Part.’
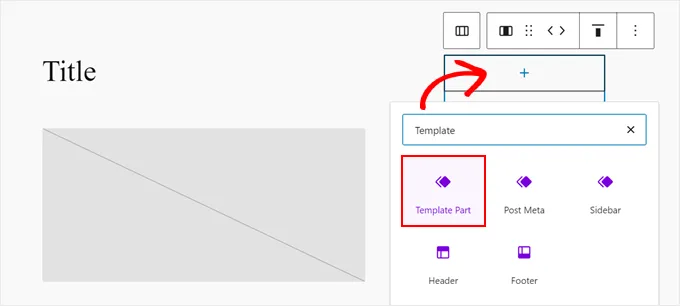
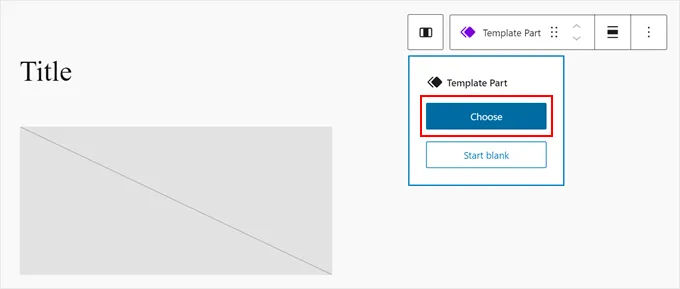
Once you’ve done that, go ahead and click ‘Choose.’
This will allow you to choose the sidebar you just created.
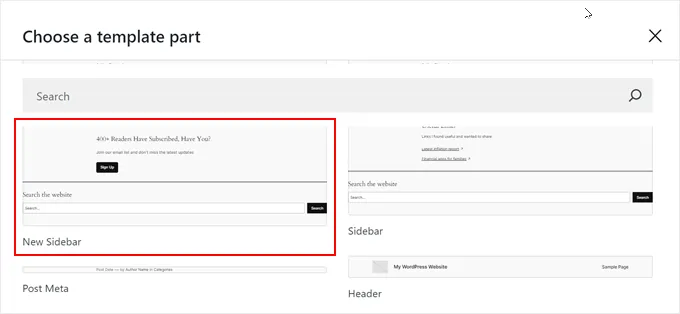
A new popup will appear, showing you the different template parts the theme has.
Here, just click on the new sidebar template.
At this stage, you can continue customizing the template if needed.
Then, just click ‘Save.’
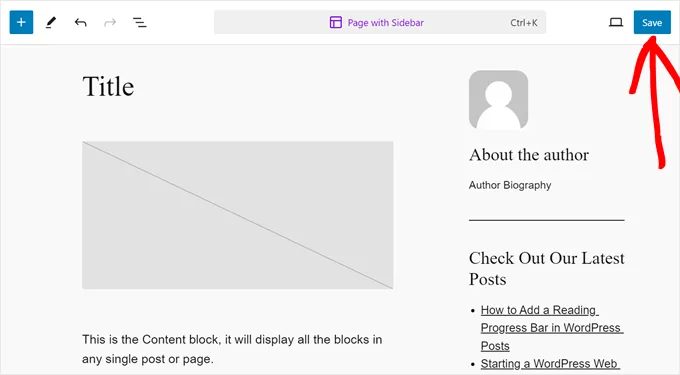
You have now customized a page template and added a custom sidebar to it.
However, we need to make sure that this template is actually used on your website.
Step 4: Assign the Template to a Page or Post
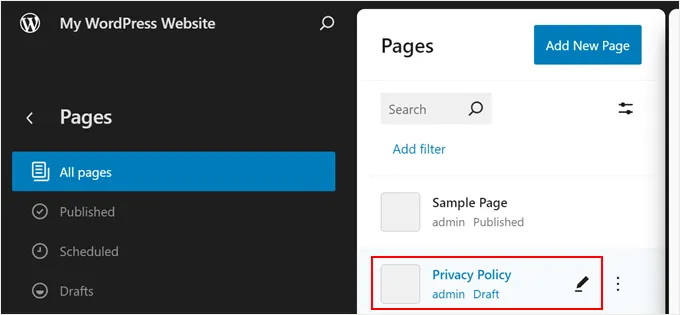
Go back to the full-site editor main menu and click ‘Pages.’
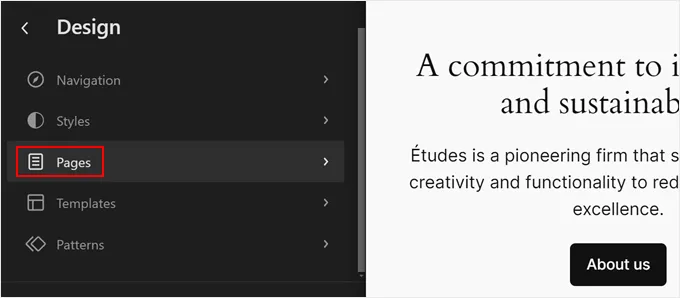
Next, choose a page you want to add the sidebar to.
For the sake of example, we will go with our ‘Privacy Policy’ page.
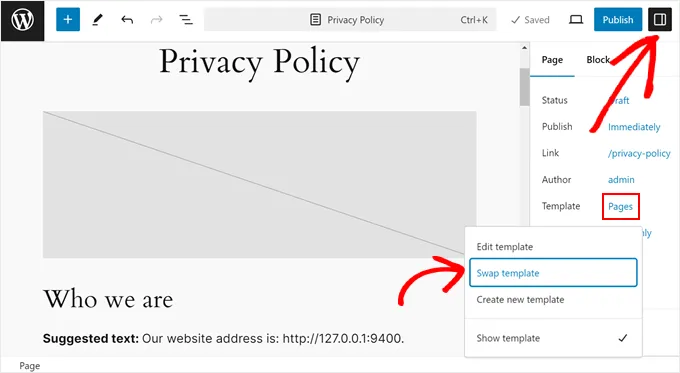
Now, click on the settings icon on the top left side of the page and click on ‘Pages’ in the page settings panel.
After that, you need to select ‘Swap template.’
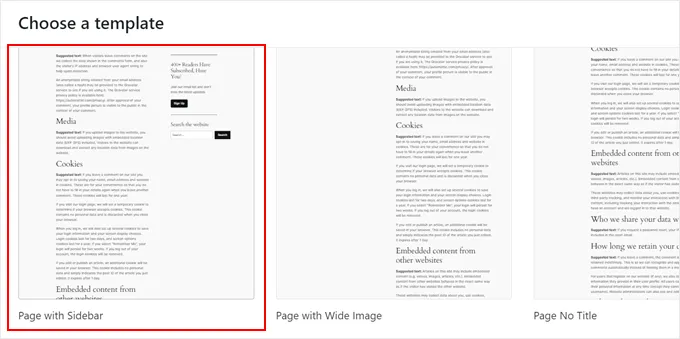
Once you do that, a popup will appear.
Here, just select the page template with the new sidebar.
And that’s it! Feel free to repeat the same steps to create a new custom sidebar and implement it on different pages and posts.
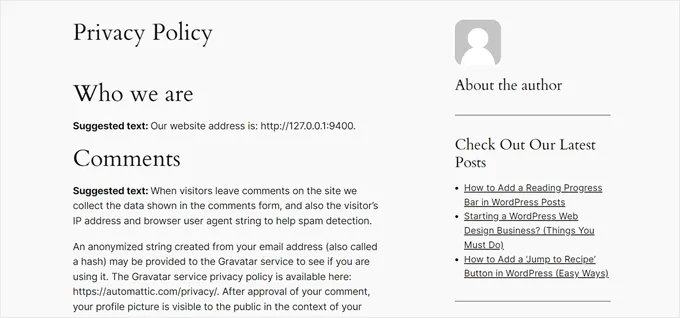
Here’s what our sample privacy policy page looks like with the new sidebar:
Note: You can create multiple custom templates this way — each with its own sidebar variation. This gives you full design control without any plugin.
Which Method Should You Use?
| Theme Type | Method | Tool / Feature | Works Without Plugin |
|---|---|---|---|
| Classic Theme | 1 | Lightweight Sidebar Manager plugin | ❌ No |
| Block Theme (FSE) | 2 | Full Site Editor (Templates) | ✅ Yes |
Make sure you know what kind of theme you’re using before choosing your method.
- If your site has Appearance » Widgets and Customizer, you’re likely using a classic theme.
- If it has Appearance » Editor, you’re using a block theme with full site editing.
Final Thoughts
Custom sidebars are a powerful way to create a more personalized and functional user experience on your WordPress site. Whether you’re using a classic theme or a modern block-based one, WordPress gives you the tools to assign unique sidebars to any page or post.
- Using a classic theme? Go with the Lightweight Sidebar Manager plugin.
- Using a block theme? Leverage the Full Site Editor to design unique sidebar layouts visually.
For more WordPress tutorials and customization guides, stick with WP Passion — where WordPress comes to life.